Ham and Cheese Sliders Make Ahead Sandwiches
- Pinterest6.0K
- Facebook57
- Flipboard0
- 6.1Kshares
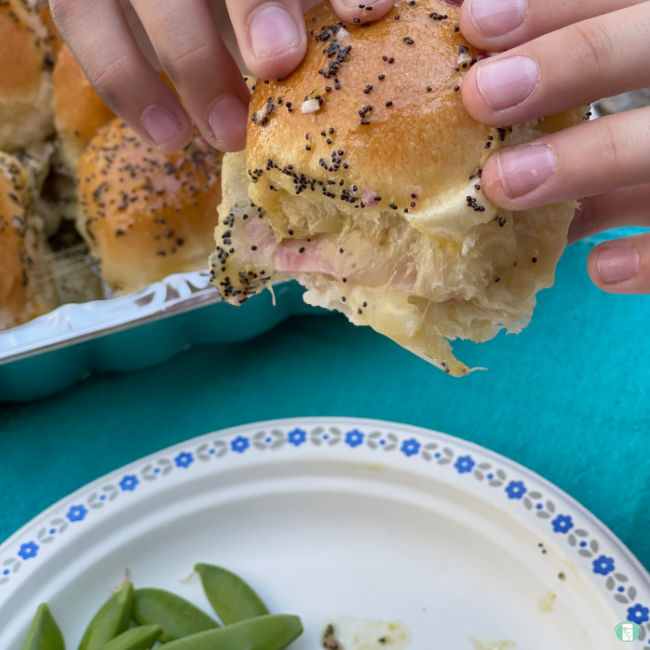
Ham and cheese sliders are a classic party snack that’s perfect for a variety of occasions. On top of being a delicious dinner idea, these mini sandwiches are perfect for youth group events, camping, and potlucks, too! But the best part about these delicious snacks is that you can make them ahead of time! These freezer-friendly sandwiches can be made up to six months in advance and stored in the freezer until you’re ready to enjoy them. We love bringing these bunwiches camping with us. In a pinch, you can even cook them on the grate on the fire.
In the video below, you can watch how these sliders are made as well as get other ideas for make ahead camping meals such as our individually wrapped hot beef sandwiches.

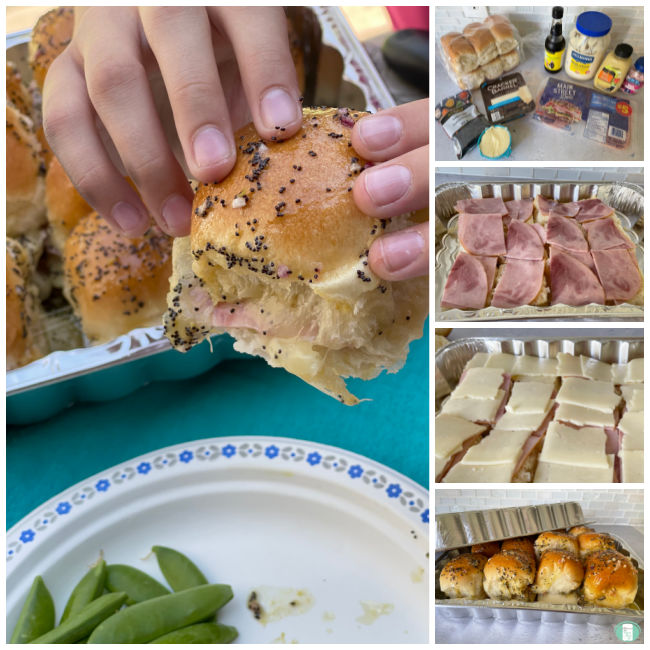
How to Make Ham and Cheese Sliders:
Ingredients:
- dozen buns
- 12 slices deli ham
- 6 cheese slices (Swiss, cheddar, or marble)
- 1/2 cup butter, melted
- 1 Tbsp. mayonnaise
- 1 Tbsp. Dijon mustard
- 1/2 Tbsp. Worcestershire
- 1 Tbsp. poppy seeds
- 1 Tbsp. honey
- 1/2 Tbsp. dried onion
Assembly Instructions:
- Place the buns on a flat surface and slice the buns all together.
- Put the bottom part of the buns in a 9×13 aluminum baking tray.
- Layer ham and cheese on top of the buns, then place the top layer of buns over the cheese.
- Mix up the dressing by combining the melted butter, mayonnaise, Dijon mustard, Worcestershire sauce, poppy seeds, honey, and dried onion in a small bowl. Spread the dressing mixture over the top of the buns.
- Cover the tray with two layers of aluminum foil and store in the freezer until you’re ready to eat.
Serving Instructions:
- Allow the sandwiches to thaw completely.
- Preheat the oven to 350° and place the covered baking dish directly in the oven.
- Bake the sandwiches for 20 minutes, until the buns are toasted and the cheese is melted.
- To enjoy, just pull the sandwiches apart out of the tray and serve them to your guests.
Can You Make Sandwiches Ahead of Time?
Sandwiches can easily be made ahead of time to help cut down on your prep work. It’s especially helpful to make sandwiches in advance if you’re preparing them for an event or party. There are two different ways you can store your pre-made sandwiches depending on how soon you plan on eating them. You can store your sandwiches or sliders in the:
- Refrigerator. If you will be eating your sandwiches within the next day or two, storing them in the refrigerator is a good option. Sandwiches can be kept in the refrigerator for up to two days. Make sure to cover your sandwiches and keep them chilled until you’re ready to eat them. And if your sandwich will have condiments or fresh vegetables on them, it’s a good idea to leave those elements off until you’re ready to serve them to keep the bread and veggies from getting soggy in the fridge.
- Freezer. For long-term storage, freezing your sandwiches is a good option. Frozen sandwiches can last up to six months. Like sandwiches stored in the refrigerator, it’s not a good idea to freeze fresh vegetables on your sandwich. But you can add sauce and condiments to your frozen sliders, if you want. Before reheating your sandwiches, make sure to allow them to thaw completely for even cooking.

What Cheese Goes Best with Ham?
There are a variety of delicious cheese options you can choose from when you’re preparing your own sliders at home. Swiss cheese seems to be a popular choice when pairing with ham, but there are a few other cheese varieties that work well on these mini sandwiches, including:
- Mozzarella
- Cheddar Jack
- Colby Jack
- Cheddar
- Monterey Jack
- Pepper Jack
- American
- Provolone
What Kind of Bread do You Use for Sliders?
While any type of mini bun works well for sliders, this recipe works best if you have a batch of buns that are connected inside the package. There are a few different options to choose from, depending on your flavour preferences, but the most popular option for making these ham and cheese sliders are:
- Hawaiian rolls. These sweet rolls come in a pack of 12 mini rolls, which are all connected in one sheet. You can easily build and bake your sandwiches by simply slicing the entire loaf in half at once.
- Dinner rolls. You can also find dinner rolls in the same type of package as Hawaiian rolls. If you don’t like the sweetness of traditional Hawaiian bread, dinner rolls are a great alternative for your sliders.
- Slider buns. While traditional slider buns won’t have the same pull-apart effect that rolls have, they’re another option for making these sandwiches. To use slider buns, you’ll need to prepare each individual sandwich and place it in the tray. After that, you can spread the sauce over the top and prepare as stated in the recipe.
Can You Freeze Hawaiian roll sliders?
You can easily freeze sliders made with Hawaiian rolls and reheat them when you’re ready to enjoy them. Simply follow the instructions for freezing these delicious sandwiches. Make sure to give your sandwiches plenty of time to thaw in the refrigerator before you bake them. It usually takes several hours for the sliders to completely thaw.
Once the sandwiches are thawed, preheat your oven to 350° and bake until the buns are toasty and the cheese is melted.

- 12 buns
- 12 slices deli ham
- 6 cheese slices Swiss, cheddar, or marble
- 1/2 cup butter melted
- 1 Tbsp. mayonnaise
- 1 Tbsp. Dijon mustard
- 1/2 Tbsp. Worcestershire sauce
- 1 Tbsp. poppy seeds
- 1 Tbsp. honey
- 1/2 Tbsp. dried onion
-
Place the buns on a flat surface and slice the buns all together.
-
Put the bottom part of the buns in a 9x13 aluminum baking tray.
-
Layer ham and cheese on top of the buns, then place the top layer of buns over the cheese.
-
Mix the dressing by combining the melted butter, mayonnaise, Dijon mustard, Worcestershire sauce, poppy seeds, honey, and dried onion in a small bowl.
-
Spread the dressing mixture over the top of the buns.
-
Cover the tray with two layers of aluminum foil and store in the freezer.
-
Thaw.
-
Preheat the oven to 350° and place the covered baking dish directly in the oven.
-
Bake for 20 minutes, until the buns are toasted and the cheese is melted.
-
Pull the sandwiches apart out of the tray or slice and serve.
Check out these other meals that are great for making ahead to take camping or to potlucks:
- Pinterest6.0K
- Facebook57
- Flipboard0
- 6.1Kshares