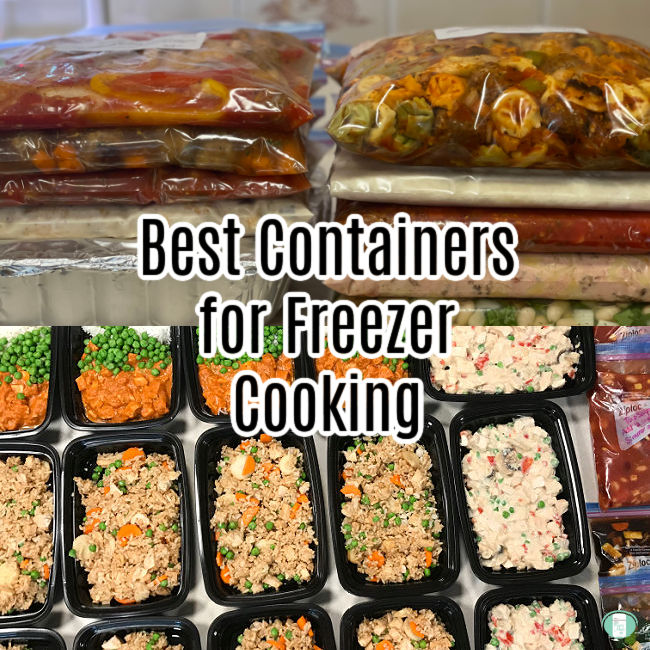
The Best Containers for Freezer Cooking
- Pinterest114
- Facebook16
- Flipboard0
- 130shares
Choosing the best containers for your freezer meals is more important than you may think. With the right containers, you can avoid freezer burn, conserve space in the freezer, and have the best chance for freezer cooking success.When freezer cooking, it’s best to choose a container that was designed for cold storage. Using an empty sour cream tub or sandwich bag will likely result in freezer burn.
Read more tips for avoiding freezer burn.
In the video below, I share my thoughts on the best meal prep containers and the pros and cons of some of the options available.

Best Containers for Freezer Meals:
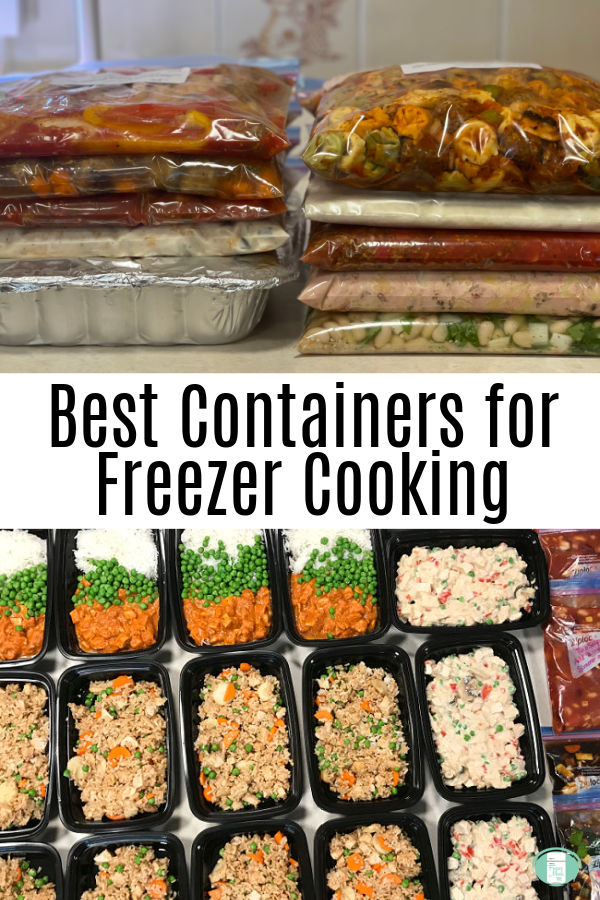
Hands down, my favourite containers for freezer meals are resealable freezer bags. They are convenient, you can see at a glance what’s in them, they hold up well, and when frozen flat and stacked, they take up very little space.
Use gallon sized bags for family size freezer meals and quart sized bags for individual sized meals or dinners for two.
Bags prevent freezer burn as long as you ensure you get all the air you can out of the bag before sealing.
I encourage you to use brand name freezer bags for this because I have had issues with the no name brand bags leaking.
Ziploc Gallon Food Storage Freezer Bags Ziploc Quart Food Storage Freezer Bags


If you have smaller items that go with the meal but need to be packaged separately such as shredded cheese for topping, we put them into a quart sized resealable freezer bag and staple them above the seal to the gallon size resealable freezer bag that the full freezer meal is in.
Note: It’s really important to staple above the seal so as not to create small holes in the bag itself.
Alternately, you can use reusable silicone freezer bags.
Space saving tip:
If you have a small over the fridge freezer, it can help conserve space if you first lay your freezer meals flat to freeze and then once frozen, stack them upright in your freezer as you would books on a bookshelf.
Best Freezer Storage for Individual Meals:
When making individual freezer meals, there are several good options. Quart sized resealable freezer bags work well for these meals.
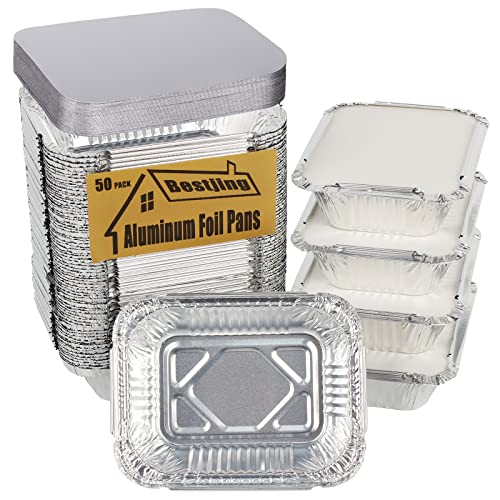
For meals that need to go into the oven, I like to use the foil pans with cardboard lids. You can easily write the cooking instructions on the lid and everything is ready to be put in the oven. This works especially well for things such as lasagna, manicotti, and enchiladas.
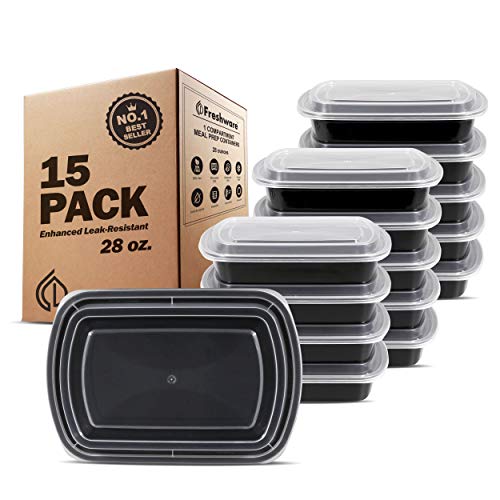
If you want to be able to reheat the meals in the microwave, you can find plastic containers that are both freezer safe and microwave safe.
Ziploc Quart Freezer BagsFreshware Meal Prep Containers Freezer Safe Microwave Safe Dishwasher SafeAluminum Foil Pans with Cardboard Lids for Meal Prep
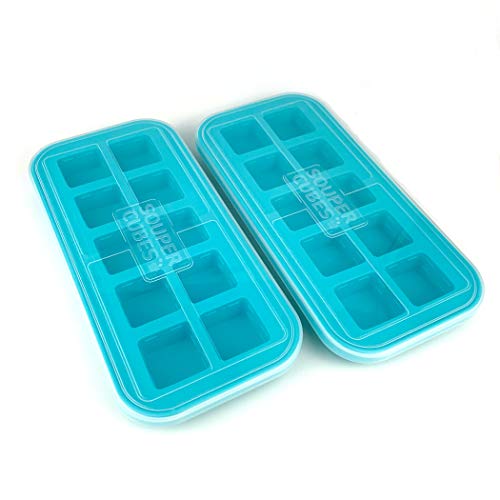
Souper Cubes are one of the simplest ways to freeze individual servings. They come in many sizes so you can choose the perfect portions. They are great for freezing leftovers or for freezer meals. Read more about Souper Cubes including some of the best recipes to freeze in them.

Best Containers for Layered Casseroles:
For family sized layered casseroles, I like to use a 9×13 foil pan. You can find them at the dollar store or the grocery store. Sometimes they have cardboard lids and sometimes I just use foil. To prevent freezer burn, I will first cover the casserole in plastic wrap, and then add the foil but be sure to make a note to yourself to remove the plastic wrap before heating in the oven! You can find deep dish foil pans that are suitable for lasagna and more shallow pans, that will fit a layer of manicotti or enchiladas, or if your casserole is on the smaller side.
Sometimes, acidic contents can eat a hole in a foil pan, such as rhubarb crisp, or even the tomato sauce in lasagna if it’s left too long. An alternative to a foil pan is to use a glass casserole dish. Again, I cover it in plastic wrap before adding to foil, just to give it one more layer of protection against freezer burn.
Never put a glass dish directly from the freezer into the oven. I recommend instead to let your casserole thaw at least part way, if not completely, before putting in the oven. You can always cook it a bit longer too if it’s still a bit frozen in the middle.
If you want to use a glass container but don’t want it to be held hostage in your freezer until it’s time to cook your meal, there is another solution. Line your container with parchment paper, add your meal, freeze it, and then once frozen, take the meal out of the container by lifting up the parchment paper and transfer it to a large freezer bag. On the day of cooking, your meal will retain the shape of the container and can be transferred directly from the freezer bag to the container to thaw and then cook.
Best Freezer Containers for Sauces and Soups:
One thing that I’ve found that works well for freezing sauces, soups, or stews is Souper Cubes. Souper Cubes allow you to portion the food and freeze and then you can reheat in individual portions or all at once.
When my husband was doing Keto, I used to freeze his chili this way. I’ve also used them to freeze soup.
While it can be tricky to zip up a resealable freezer bag with a lot of liquid in it, with a bit of practice and maybe a bit of help, it works well. The advantages of using freezer bags are that they will then lay flat to freeze, which saves space, and they will thaw quickly and evenly.
Best for Freezing Baby Food:
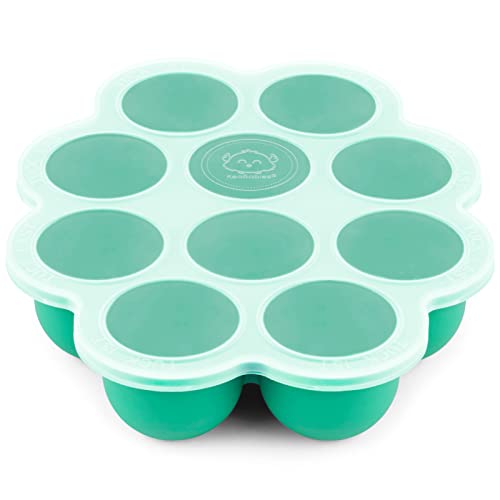
When making baby food, it can be pureed and poured into ice cube trays. You can find ice cube trays at any grocery store or dollar store. Souper Cubes has a tray in just the right size that includes a lid so it is perfect for freezing baby food.
Once frozen, you can pop them out and add them to a resealable freezer bag to store in your freezer. You can use a gallon size or a quart size depending on how many cubes you end up with.
Typical ice cube trays hold 2 Tbsp. of liquid in each “cube”. Two cubes will equal a quarter cup. As your baby grows and can eat more, you can add more cubes to defrost for him or her. Also, as your baby grows and can eat chunkier food, you can save and freeze leftovers into the ice cube trays. It will thaw quickly and reheat quickly.
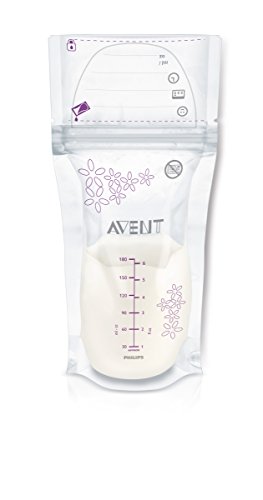
Breast milk is also safe to freeze as long as it is stored properly. Freeze breast milk in a breast milk storage bag or freezer tray with a secure lid. It’s important to follow the proper guidelines when freezing breast milk.
Souper Cubes 2 Tablespoon Freezing Tray with lid Ice Cube Trays For FreezerSilicone Baby Food Freezer Tray with Clip-on Lid Also works for Breast MilkPhilips AVENT Breast Milk Storage Bags for Freezer

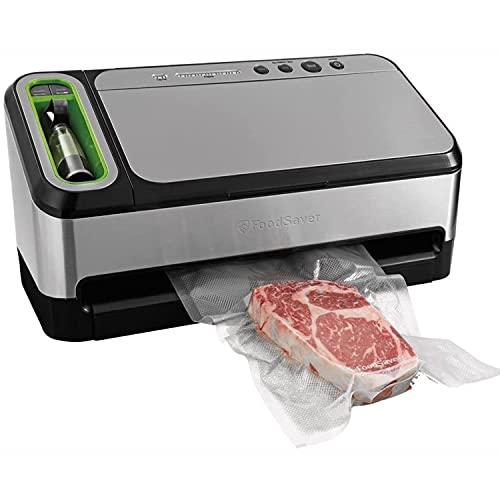
Best Part of Using a Vacuum Sealer:
While I haven’t used a vacuum sealer for freezer meals often, some people love them and swear by them. Their biggest advantage? Almost zero freezer burn! They can be a bit expensive up front. You have to purchase the machine and the bags. However, it is so effective at removing the air during the vacuum and sealing process, you almost never have to throw out food due to freezer burn. FoodSaver claims that food in their vacuum sealed bags will be good for two to three years!
Vacuuming solid food is fairly straight forward, but when you are including a sauce or wanting to vacuum seal soup or chili, the best method is to freeze it first. Use a container that you know will fit inside a vacuum seal bag. Freeze your meal. Pop it out of the container and transfer it to your bag for sealing. Some people will freeze their food in the shape of their instant pot or slow cooker so they can truly go from freezer to cooking!
If you do manage to find a way to get soup into a vacuum seal bag, be aware that liquids expand when they freeze. Expansion can ruin the seal on your bag, causing your food to spoil faster than it should and potentially make a mess!
FoodSaver Vacuum Sealer Machine for Airtight Food StorageFood Saver Vacuum Seal Rolls and Vacuum Sealer Bags

Best Foods to Freeze Flat:
There are times when you will want to freeze foods that are used individually, such as pancakes, waffles and French toast. If you freeze them in a bag altogether after cooking, you can try put wax paper or parchment paper in between each pancake to prevent them from sticking together. However, the simplest solution is this: using a cookie sheet.
Place some parchment paper down first, and then lay your pancakes flat on the pan. Place it in your freezer for 20-60 minutes. Once frozen, transfer the pancakes to a resealable freezer bag and they won’t stick together when you go to use them. Our kids have been eating breakfast foods this way for years, by just taking one or two out of the bag and them popping them in the toaster!
Other foods that freeze well by this method:
- hamburger patties
- uncooked meatballs
- quesadillas
- fresh produce, such as strawberries, raspberries, blueberries, and even bananas!
- appetizers, such as bacon wrapped anything
- squares, cookies, and other baking

- Pinterest114
- Facebook16
- Flipboard0
- 130shares